Product photography is not a nice-to-have — it is the primary driver of online sales conversion for 3D printed products. In a marketplace where buyers cannot touch, hold, or examine your prints in person, your photos are your sales pitch. The difference between a listing that converts at 2 percent and one that converts at 8 percent is almost always the quality of the images.
This guide covers everything from basic lighting setups to advanced techniques that make 3D printed collectibles look as impressive on screen as they do in person.
Why Photography Matters More for 3D Prints
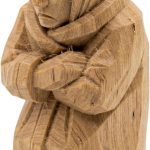
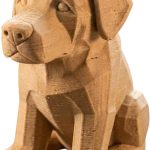
3D printed products face a unique perception challenge. Many buyers still associate 3D printing with rough, layer-visible prototypes rather than finished collectibles. Your photography must overcome this bias by showcasing print quality, surface finish, and design detail at a level that demonstrates craftsmanship.
High-quality product photos achieve several things simultaneously. They communicate print quality by showing smooth surfaces, clean details, and consistent finishes. They convey scale and proportions that help buyers understand exactly what they are purchasing. They build trust by demonstrating professional presentation. And they differentiate your listings from the thousands of poorly photographed 3D prints competing for the same buyers.
Essential Lighting Setup
Lighting is the single most impactful element of product photography. Even a smartphone camera produces professional-looking results with proper lighting, while an expensive camera cannot compensate for bad light.
The Two-Light Diffused Setup
The most versatile lighting arrangement for 3D printed products uses two LED panel lights positioned at 45-degree angles to the product, each diffused through a softbox, white umbrella, or even a sheet of white fabric. This creates even, shadow-free illumination that reveals surface detail without harsh reflections.
Position your key light (the brighter or closer one) at 45 degrees to the left or right of the product. Place your fill light on the opposite side, slightly farther back or at lower intensity, to soften shadows without eliminating them entirely. Some shadow definition is desirable — it creates depth and three-dimensionality in the image.
Adding a Back Light
A third light positioned behind and above the product creates edge separation, making the print pop against the background. This is particularly effective for dark-colored prints on dark backgrounds or light prints on white backgrounds where the edges might otherwise blend.
Budget-Friendly Alternatives
You do not need expensive studio lighting to start. A folding photo lightbox ($30 to $80) provides diffused lighting, a clean background, and consistent results. Natural window light on an overcast day produces beautiful, soft illumination — position the product near a large window with a white reflector (even a piece of white foam board) on the opposite side to fill shadows.
Background Selection and Consistency
Your background choice affects both the visual impact of individual photos and the professional cohesion of your entire shop.
White Backgrounds
Clean white backgrounds are the standard for marketplace listings on Amazon and are strongly preferred for Etsy search visibility. White creates a neutral, distraction-free presentation that puts all attention on the product. Use seamless white paper or fabric curved from vertical to horizontal to eliminate the background seam line.
Dark and Colored Backgrounds
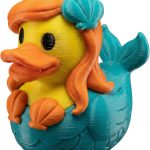
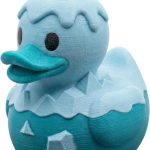
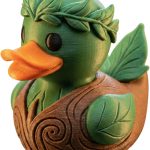
Dark gray or black backgrounds create dramatic presentations ideal for metallic finishes, bright-colored prints, and premium product positioning. Many sellers in the 3DCentral Shop use dark backgrounds to emphasize the vibrant colors of collectible figurines and detailed gnomes.
Choose one primary background style and use it consistently across your entire catalog. Shoppers browsing your listings should immediately recognize your products from the consistent visual presentation. Mixing backgrounds randomly creates a disjointed, unprofessional appearance.
Textured and Contextual Backgrounds
For hero images on your own website or social media, textured backgrounds like wood grain, slate, or fabric add visual interest. Use these selectively for featured products while maintaining clean backgrounds for standard listings.
Camera Angles That Drive Sales
Each angle serves a specific purpose in communicating product information to potential buyers.
The Essential Five
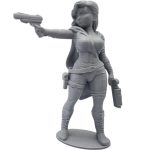
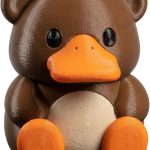
A front-facing shot at eye level establishes the primary impression and should be your main listing photo. The three-quarter angle (turned roughly 30 degrees) shows depth and dimensionality, often the most flattering angle for figurines and sculptural pieces. A direct side view communicates proportions and profile details. The back view shows completeness and build quality — buyers who see the back of a product trust that the seller is not hiding flaws. A close-up detail shot of the most impressive area — face detail on a figurine, texture on a duck, or articulation joints on a flexi print — builds quality confidence.
Scale Reference
Always include at least one photo showing scale. A common coin, a hand holding the product, or the product placed next to a familiar object eliminates the most common source of buyer disappointment: size expectation mismatch. This single addition to your photo set reduces returns and negative reviews.
Articulated and Functional Demonstrations
For articulated prints like flexi dragons, segmented animals, or jointed figurines, show multiple poses. A series of three to four images demonstrating the range of motion communicates the interactive value of the product far better than a single static shot.
Lifestyle and Context Photography
Lifestyle photos show products in real-world settings: a gnome on a garden shelf, a dragon on a bookshelf with books and plants, a duck on an office desk. These contextual shots serve two purposes — they help buyers visualize the product in their own space, and they create emotional connection that drives impulse purchases.
Lifestyle photography does not require professional staging. A clean, well-lit corner of your home with a few complementary props creates authentic scenes that feel aspirational without appearing staged. Shoot lifestyle photos in natural light near a window for the most inviting results.
Post-Processing and Editing
Even well-shot photos benefit from basic editing. The goal is accurate representation with professional polish, not dramatic manipulation.
Essential Edits
Crop consistently across all listings — same aspect ratio, same approximate product size in frame. Adjust white balance so whites appear truly white and colors appear accurate to the physical product. Increase contrast slightly to enhance surface detail without losing shadow information. Apply subtle sharpening to compensate for any slight softness from camera optics.
Batch Editing for Consistency
When you shoot dozens or hundreds of products, individual editing becomes impractical. Develop a preset or workflow that applies your standard adjustments to all images in a batch. Tools like Lightroom, Capture One, or free alternatives like Darktable support preset-based batch processing. This ensures visual consistency across your entire catalog while dramatically reducing editing time.
Color Accuracy
Color accuracy is critical for 3D printed products. Buyers who receive a teal figurine when they expected blue leave negative reviews. Calibrate your monitor if possible, and always compare your edited photos against the physical product on multiple screens (phone, tablet, laptop) before publishing. When in doubt, err on the side of accuracy over flattering color enhancement.
Photography for Different Sales Channels
Each platform has specific image requirements and best practices. Amazon requires a pure white background for the main image with the product filling at least 85 percent of the frame. Etsy favors the first image in search results and allows more creative styling. Your own website gives you complete creative control. Shoot a comprehensive set during each photo session and select platform-appropriate images for each channel.
Visit the 3DCentral Blog for more insights on building a successful 3D print business, from production optimization to marketing strategies.
Frequently Asked Questions
Q: What camera do I need for product photography of 3D prints? A: A modern smartphone with a good camera (iPhone 12 or newer, Samsung Galaxy S21 or newer, Google Pixel 6 or newer) produces excellent product photos when paired with proper lighting. Dedicated cameras offer more control but are not necessary to start. Lighting quality matters far more than camera quality for product photography.
Q: How many photos should I include per product listing? A: Include a minimum of five photos: front view, three-quarter angle, detail close-up, scale reference, and either a back view or lifestyle shot. Etsy allows up to ten images per listing — use as many as needed to fully communicate the product. Amazon allows up to nine images including a video slot.
Q: How do I photograph very small or very detailed prints? A: For small prints (under 5 cm), use macro mode on your camera or phone, or invest in a clip-on macro lens ($15 to $30). Increase lighting intensity since macro shooting at close distances reduces the light reaching the sensor. Use a tripod or phone mount to eliminate camera shake, which is amplified at close focusing distances.