The whimsical 3D printed duck phenomenon has captured collectors worldwide, but few understand the intricate process that transforms a designer’s imagination into a tangible collectible sitting on your shelf. The journey from concept to finished product combines artistic creativity, technical engineering, production efficiency, and rigorous quality control.
This comprehensive behind-the-scenes guide reveals exactly how 3D printed ducks — and collectibles generally — are designed, optimized, manufactured, and delivered to customers. Whether you are a curious collector, aspiring designer, or print farm operator, understanding this process deepens appreciation for the craftsmanship involved.
The Creative Concept Phase
Every duck collectible begins with an idea — sometimes a visual pun, sometimes a character concept, sometimes a theme that resonates with current trends or seasons.
At 3DCentral, our design team and community artists constantly explore new concepts. The process typically starts with brainstorming sessions examining:
Trending Themes — What are collectors currently excited about? Are fantasy crossovers popular? Are seasonal variations selling well? Do articulated designs outperform static ones?
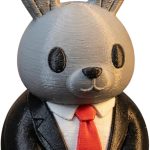
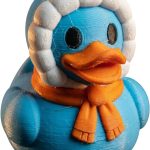
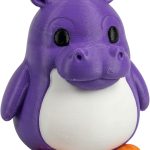
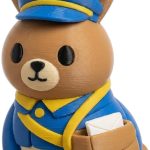
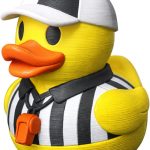
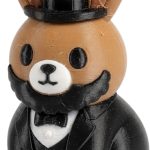
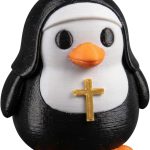
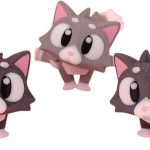
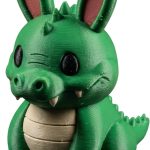
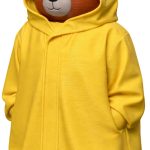
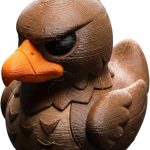
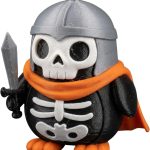
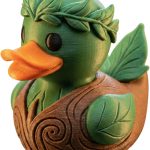
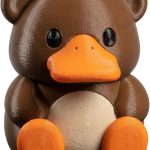
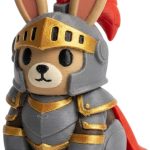
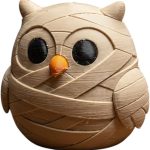
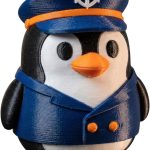
Visual Humor — Duck designs often play with juxtaposition — a duck dressed as a historical figure, a duck in an unexpected profession, a duck reimagined as a fantasy creature. The incongruity creates charm and shareability.
Cultural Moments — Holidays, seasons, current events, and popular culture all inspire timely designs. A harvest duck works in October, a Valentine’s duck in February, a graduation duck in June.
Artistic Exploration — Sometimes designs emerge purely from artistic experimentation — exploring new textures, testing geometric patterns, pushing technical boundaries.
Once a concept is selected, designers create rough sketches exploring different poses, proportions, expressions, and accessories. This ideation phase might involve dozens of quick sketches before committing to 3D modeling.
The Digital Sculpting Process
With a concept approved, designers move into digital 3D modeling using specialized software:
Software Selection
ZBrush — Industry-standard digital sculpting software perfect for organic, character-focused designs. Most duck designers use ZBrush for its intuitive brush-based sculpting interface and detailed texture capabilities.
Blender — Free, open-source 3D software excellent for both sculpting and hard-surface modeling. Popular with independent designers and community artists who cannot afford expensive software licenses.
Fusion 360 — Best for mechanical or articulated designs requiring precise measurements and engineering. Used for designing articulated joints, interlocking parts, and technical accessories.
Nomad Sculpt — Mobile sculpting app allowing designers to work on tablets. Increasingly popular for quick concept development and on-the-go creativity.
Sculpting Technique
Designers build the duck model progressively, starting with basic shapes and refining details iteratively. The process typically follows this sequence:
- Base Form — Establish overall proportions and silhouette using simple geometric primitives
- Primary Anatomy — Define body, head, wings, and feet with proper proportions
- Feature Refinement — Add beak details, eye sockets, feather textures, and characteristic duck anatomy
- Character Elements — Incorporate theme-specific accessories, costumes, props, or modifications
- Surface Detailing — Add fine textures, patterns, and surface variations
- Expression and Personality — Refine facial features to convey personality and emotion
A typical duck design requires 8-20 hours of modeling time depending on complexity. Simple ducks might need just 4-6 hours, while elaborate multi-part articulated designs can exceed 30 hours.
Artistic Considerations
Designers balance several competing priorities:
Visual Appeal — The model must look attractive from multiple angles, not just the hero render angle.
Printability — Overhanging features, thin details, and impossible geometries must be avoided or minimized.
Structural Integrity — The finished print needs to stand stably, resist breaking, and handle reasonable shipping stress.
Theme Clarity — Accessories and costume elements must be recognizable at small scale.
Production Economics — Extremely long print times or high failure rates make designs economically unviable.
Finding the balance between artistic vision and practical manufacturability requires experience and iteration.
Optimizing for 3D Printing
A beautiful 3D model is not automatically a printable 3D model. Technical optimization transforms artistic designs into production-ready files:
Wall Thickness Analysis
Every surface must have sufficient thickness to print reliably. Features thinner than 0.8mm become fragile and prone to breaking. Designers check and thicken walls as needed, particularly in delicate areas like beaks, tiny accessories, or thin decorative elements.
Overhang Management
FDM 3D printing builds from bottom to top, depositing melted filament layer by layer. Features that extend outward without support underneath — overhangs exceeding 45 degrees — require support structures that add print time, waste material, and leave surface imperfections.
Designers minimize severe overhangs through several techniques:
- Angling features to stay within 45-degree printability
- Reorienting the model to change which direction is “up”
- Splitting models into multiple pieces that print separately and assemble
- Accepting some support structures where unavoidable
Base Design
The bottom surface of the model must provide stable contact with the printer bed. Designers create flat bases, add stabilizing feet, or design custom bases that enhance both functionality and aesthetics.
A well-designed base prevents warping, eliminates first-layer adhesion failures, and ensures the finished duck stands reliably without tipping.
Multi-Part Design Considerations
Complex ducks sometimes require printing in separate pieces that assemble after production:
Articulated Joints — Shoulders, necks, or limbs that move require ball-and-socket joints, hinges, or pin connections designed with appropriate tolerances.
Large Elements — Accessories too large to fit within printer build volumes print separately and attach via friction fit, glue, or magnetic connections.
Color Variation — Multi-part designs allow printing different components in different colors, creating visual variety without requiring multi-material printers.
File Optimization
The final STL file is processed to ensure clean, watertight geometry:
- Repairing inverted normals (inside-out surfaces)
- Fixing non-manifold edges (geometry errors that prevent slicing)
- Reducing polygon count where possible to decrease file size
- Verifying model is manifold (properly closed solid)
- Setting appropriate scale and units
Software like Meshmixer, Netfabb, or built-in repair tools handle these technical details.
Prototype Testing and Iteration
Before a design enters full production, 3DCentral prints multiple prototypes to identify and fix issues:
First Print Evaluation
The initial prototype reveals how the digital model translates to physical reality. Common discoveries include:
- Details too fine to print clearly at 0.16mm layer height
- Support structures leaving unacceptable surface marks
- Colors appearing different in physical filament versus digital renders
- Weak points that break easily during handling
- Proportions that look wrong in three dimensions despite looking good on screen
Iterative Refinement
Based on prototype results, designers modify the model and print again. This cycle repeats until the design meets quality standards. Typical iterations include:
Iteration 1 — Identify major structural or printability issues Iteration 2 — Fix primary problems, discover secondary issues Iteration 3 — Fine-tune details and optimize supports Iteration 4 — Final validation print
Complex designs might require 5-8 iterations. Simple ducks might succeed on the second print.
Production Settings Development
Slicing technicians develop optimized print profiles specifying:
- Layer height (typically 0.16mm for ducks, balancing detail with speed)
- Infill percentage (15-20% for most collectibles)
- Print speed (adjusted for quality versus throughput)
- Support structures (type, density, and placement)
- Temperature settings (vary by filament color and brand)
- Cooling settings (critical for overhangs and small details)
These profiles are saved and reused for production consistency.
The Production Printing Process
Once approved, the design enters the production queue at our Quebec print farm:
Print Queue Management
Orders are prioritized based on:
- Order date and customer shipping deadlines
- Printer availability and capability matching
- Material availability (specific filament colors)
- Print time optimization (grouping similar durations)
Software schedules jobs across our 200+ printer fleet to maximize efficiency and minimize customer wait times.
The Print Itself
A typical duck figurine prints in 2-6 hours depending on size and complexity:
Small Ducks (under 3 inches) — 2-3 hours Medium Ducks (3-5 inches) — 3-5 hours Large Ducks (over 5 inches) — 5-8 hours Multi-Part Articulated Designs — 6-12 hours total across components
The printer deposits PLA filament layer by layer, building the duck from bottom to top. Temperatures around 200-210°C melt the filament, which rapidly cools and solidifies upon contact with previous layers.
Support structures print simultaneously where needed, later removed during post-processing.
Monitoring and Quality Control During Printing
Printers are monitored throughout production cycles. Automated systems alert technicians to failures like:
- Filament runout or tangles
- Print detachment from bed
- Layer shifting or misalignment
- Extruder clogs
- Temperature anomalies
Catching failures early minimizes wasted time and material.
Post-Processing and Finishing
Once printing completes, items move to post-processing:
Support Removal
Support structures are carefully removed using flush cutters and needle files. Skilled technicians work methodically to avoid damaging the main print while removing all support material.
Areas where supports attached are examined for quality. Excessive scarring or rough surfaces may cause the piece to fail quality inspection.
Surface Finishing
Most collectibles ship with standard FDM surface finish — visible layer lines that are part of the aesthetic. Some premium items receive additional finishing:
- Light sanding on bases or flat surfaces
- Primer and paint for custom orders
- Clear coating for enhanced color depth and protection
- Assembly of multi-part designs
Quality Inspection
Every duck passes through manual quality inspection checking:
- Dimensional accuracy (correct size and proportions)
- Color matching (proper filament used)
- Layer adhesion (no delamination or separation)
- Detail clarity (small features printed cleanly)
- Surface quality (no excessive stringing, blobs, or defects)
- Structural integrity (no cracks or weak points)
Items failing inspection are recycled and reprinted. At 3DCentral, our defect rate is under 2% thanks to optimized profiles and skilled operators.
Packaging and Shipping
Approved ducks move to fulfillment where they are carefully packaged:
Each duck is wrapped in tissue paper for protection and presentation, placed in a right-sized box with crinkle paper void fill, sealed with branded tape, and labeled with shipping information.
The package is weighed, postage is applied, and the item enters the carrier logistics network for delivery. Most Canadian orders ship via Canada Post Expedited Parcel and arrive within 3-7 business days. US orders typically arrive in 7-14 days.
The Role of Community Artists
3DCentral’s catalog features both in-house designs and models from talented community artists. This collaborative approach benefits everyone:
Artists gain access to production capabilities, marketing reach, and revenue streams they could not achieve independently. Rather than printing and selling limited quantities themselves, artists license designs to 3DCentral for scaled production.
3DCentral benefits from diverse creative perspectives, faster catalog expansion, and connection to broader design communities.
Customers enjoy vastly wider selection and continuous new releases as multiple designers contribute creativity.
Community designs follow the same rigorous testing, optimization, and quality standards as in-house models. The source of creativity varies, but production excellence remains consistent.
Design Innovation and Future Trends
The 3D printed collectibles space continues evolving rapidly:
Multi-Material Printing — Next-generation printers capable of using multiple filament colors or types simultaneously will enable more complex, colorful designs without manual painting.
Sustainable Materials — New bio-based filaments and recycled PLA formulations will reduce environmental impact while maintaining quality.
Parametric Customization — Designs that allow customers to adjust proportions, accessories, or features before printing will enable mass customization at scale.
Functional Integration — Incorporating electronics, magnets, or mechanical features transforms static collectibles into interactive displays.
AI-Assisted Design — Artificial intelligence tools will help designers generate variations, optimize printability, and accelerate iteration cycles.
At 3DCentral, we continuously invest in new technologies, materials, and techniques that expand creative possibilities while maintaining the quality and craftsmanship collectors expect.
Frequently Asked Questions
What software is used to create 3D printed figurines? Our artists use professional tools including ZBrush for organic sculpting, Blender for character modeling, and Fusion 360 for mechanical and articulated designs. Each has strengths suited to different design styles.
How long does it take to design a new duck? Simple designs require 4-8 hours of modeling time. Complex articulated or highly detailed ducks can take 20-40 hours including iterations and testing.
Can I submit a design to 3DCentral? We welcome artist submissions. Community designs go through the same rigorous testing and optimization process as our in-house models before being added to the catalog. Contact us through our website for submission guidelines.
Why do some ducks have visible layer lines? Layer lines are inherent to FDM 3D printing, where objects build layer by layer. These lines are part of the aesthetic that distinguishes 3D printed collectibles from injection-molded mass production. They are features, not defects.
Can designs be customized before printing? Most catalog items print as designed. For custom color requests or special modifications, contact our customer service team to discuss possibilities and pricing.