You have found the perfect 3D model. The renders look stunning. You load it into your slicer and the preview shows a mangled mess of missing faces, floating geometry, and impossible structures. This scenario plays out daily for 3D printing enthusiasts and professional operators alike. File issues are the most common barrier between a downloaded model and a successful print, but nearly every problem has a straightforward fix once you understand what is actually wrong.
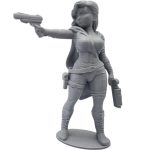
At 3DCentral, every design in our catalog of over 4,000 collectibles passes through rigorous file validation before entering production. Running 200+ printers means a file error does not just waste one print, it can waste dozens simultaneously. The mesh repair knowledge that our production team applies at scale is the same knowledge that benefits anyone preparing files for printing, whether you run one printer or one hundred.
Non-Manifold Geometry: The Most Common Culprit
Non-manifold geometry is the single most frequent 3D file error. In mathematical terms, a manifold mesh is one where every edge is shared by exactly two faces, creating a fully enclosed, watertight surface. Non-manifold errors occur when this rule is broken: edges shared by three or more faces, edges with only one face (open boundaries), or vertices where the mesh pinches to a single point.
Why Non-Manifold Errors Happen
These errors typically originate during the modeling process. Boolean operations that did not fully resolve, deleted faces that left holes, duplicated vertices occupying the same position, and imported components that overlap without proper merging all create non-manifold geometry. Models assembled from multiple parts are particularly prone to these issues.
Repair Methods
Microsoft 3D Builder (Windows): The simplest fix for many users. Open the STL file in 3D Builder and it automatically detects and offers to repair mesh issues. Click “Repair” and export the fixed file. This handles the majority of simple non-manifold errors with zero manual intervention.
Meshmixer (Free, Cross-Platform): Autodesk Meshmixer provides more control over the repair process. Import the file, go to Analysis > Inspector, and the tool highlights every mesh error with colored markers. Click individual errors to fix them, or use “Auto Repair All” to batch fix everything. Meshmixer preserves more detail than 3D Builder during repair, making it the better choice for intricate figurines and detailed sculptures.
Blender (Free, Cross-Platform): For errors that automated tools cannot resolve, Blender’s mesh editing mode provides full manual control. Select All (A), then Mesh > Clean Up > Merge by Distance to fix duplicate vertices. Use Select > All by Trait > Non Manifold to highlight problem edges, then manually close holes or remove extra faces. This requires more skill but handles edge cases that automated tools miss.
Inverted Normals: The Inside-Out Problem
Every face in a 3D mesh has a normal vector, an invisible arrow pointing outward from the surface. Normals tell the slicer which side of the face is the exterior of the object and which is the interior. When normals point inward, the slicer interprets that face as inside-out, potentially creating infill where there should be a surface or vice versa.
Detecting Inverted Normals
Most 3D modeling software can display normals visually. In Blender, enable Face Orientation overlay in the viewport. Correctly oriented faces display as blue, while inverted faces display as red. In Meshmixer, inverted faces often appear as dark patches or transparent areas when viewed in the standard display mode.
Modern slicers like PrusaSlicer 2.7+ and Cura 5.x automatically detect and correct inverted normals during import. However, relying on the slicer to fix normals can produce unpredictable results with complex meshes. Fixing them in the source file is always more reliable.
Fixing Normals
In Blender: Select the affected faces in Edit mode, then use Mesh > Normals > Recalculate Outside. For organic models, this single operation fixes 95% of normal issues. For complex mechanical assemblies, you may need to select and flip individual faces manually using Mesh > Normals > Flip.
In Meshmixer: The Inspector tool flags inverted normals alongside other mesh errors. Auto Repair typically resolves normal issues as part of the general repair process.
Thin Walls and Zero-Thickness Geometry
FDM printers deposit material through a nozzle with a fixed diameter, typically 0.4mm. Any wall in the model thinner than the nozzle diameter is physically impossible to print in a single pass. Walls between one and two nozzle widths (0.4mm to 0.8mm) may print but will be fragile and inconsistent. For reliable results, minimum wall thickness should be 1.2mm, which equals three perimeter passes with a standard nozzle.
Common Thin-Wall Scenarios
Decorative details are the most frequent offender. Filigree patterns, thin wings, sword blades, antenna, and ornamental scrollwork are often modeled with wall thicknesses that look beautiful in a render but cannot survive the printing process. The designer may have created the model for SLA (resin) printing, which handles much thinner features than FDM.
Thickening Walls
Blender Solidify Modifier: Apply a Solidify modifier to add thickness to thin surfaces. Set the thickness value to your minimum wall target (1.2mm or greater) and adjust the offset to control which direction the material is added. This non-destructive approach lets you preview the result before committing.
Meshmixer Extrude and Offset: Select thin regions and use the Offset tool to push surfaces outward, adding material to reach minimum thickness. This requires more manual work but provides precise control over exactly which areas get thickened.
Slicer Detection: PrusaSlicer highlights thin walls in the preview that may not print correctly. Use the layer preview to scroll through the model and look for gaps where perimeters do not form complete loops. These gaps indicate walls too thin for reliable printing.
Self-Intersecting Geometry
Self-intersection occurs when parts of the mesh pass through each other. This commonly happens when a model is assembled from multiple components that overlap rather than being cleanly merged. A figurine whose arm passes into the torso, or a base that overlaps with the figure’s feet, creates ambiguous interior geometry that confuses the slicer.
Boolean Union Fix
The proper fix is a Boolean Union operation that merges overlapping parts into a single clean mesh. In Blender, select both objects, use the Boolean modifier set to Union, and apply it. The operation calculates the combined exterior surface and removes all internal geometry. In Meshmixer, use Edit > Boolean Difference/Union to achieve the same result.
Boolean operations can fail on complex meshes. If the operation produces errors, first repair each component individually using the mesh repair tools described above, then attempt the Boolean again on the clean meshes.
File Size Optimization
Extremely high-polygon models slow down slicing, consume excessive memory, and may crash older computers. A character figurine exported at maximum subdivision might contain 10 million or more triangles, when 500,000 to 2 million triangles would produce identical print results on an FDM printer. The printer resolution is limited by the nozzle size and layer height, so polygon detail beyond what those physical constraints can reproduce is wasted data.
Decimation
Decimation reduces polygon count while preserving visible shape. In Blender, the Decimate modifier with the Ratio slider lets you reduce polygon count by a target percentage. A ratio of 0.3 (30% of original) often produces no visible change for FDM printing while dramatically reducing file size and slicing time. In Meshmixer, Edit > Reduce uses a similar approach with the option to set a target triangle count directly.
For production environments processing hundreds of files, keeping models in the 500K to 2M triangle range balances detail preservation with processing efficiency. At 3DCentral, optimizing file sizes across the shop catalog ensures smooth production workflows across the entire 200-printer fleet.
Prevention: Good Modeling Habits
The best mesh repair is the repair you never need to perform. Designers who understand print constraints build clean files from the start. Keep models manifold throughout the design process rather than fixing issues at the end. Test print at prototype quality early and often. If you design for the 3D printing community, document your recommended print settings. And if you want your designs produced at production quality without managing the printing yourself, the Commercial License provides access to 3DCentral’s full catalog of production-validated files.
Frequently Asked Questions
Q: What is the easiest free tool to fix a broken 3D file for printing? A: Microsoft 3D Builder on Windows is the simplest option. Open the STL file and it automatically detects and offers to repair mesh issues with a single click. For more control and better detail preservation on complex models, Meshmixer is the recommended free tool. Both handle the most common errors including non-manifold geometry, holes, and inverted normals.
Q: Why does my 3D model look fine on screen but fail to slice correctly? A: Screen rendering and slicer processing use different rules. Rendering engines display surfaces visually and can hide underlying geometry errors. Slicers must calculate physical toolpaths through solid geometry, so they are sensitive to non-manifold edges, inverted normals, self-intersections, and thin walls that look fine visually but are not physically printable. Always inspect the slicer’s layer preview before printing.
Q: What is the minimum wall thickness for FDM 3D printing? A: For reliable FDM printing with a standard 0.4mm nozzle, minimum wall thickness should be 1.2mm (three perimeter passes). Walls between 0.4mm and 0.8mm may print but will be fragile and inconsistent. Walls thinner than 0.4mm are physically impossible to print with a standard nozzle. SLA (resin) printers handle much thinner walls, so models designed for resin may need wall thickening before FDM printing.