The first day of spring carries a particular energy for anyone who maintains a garden. After months of frozen ground and dormant beds, the equinox signals the return of growth, color, and life to outdoor spaces. For collectors who extend their 3D printed figurine displays into the garden, spring’s arrival means it is time to assess, refresh, and reimagine outdoor arrangements with seasonal designs that celebrate the new growth all around them.
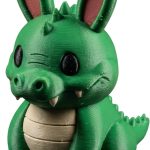
Garden gnome placement is an art form with deep roots in European horticultural tradition, and 3D printing has expanded the creative possibilities far beyond what was available with mass-produced ceramic figures. Modern 3D printed garden gnomes offer detail, variety, and material performance that would have been unimaginable a decade ago. This guide covers everything from post-winter assessment to spring placement strategies to material selection for outdoor durability.
Post-Winter Assessment
Before adding any new pieces to your garden, take stock of what survived the winter and what needs attention. Canadian winters test outdoor 3D prints rigorously, and honest assessment prevents disappointing spring displays.
Inspecting Overwintered Pieces
Walk your garden and examine every 3D printed piece that remained outdoors through the winter months. PETG gnomes and figurines typically weather Canadian winters well, but even resilient materials deserve inspection. Look for surface crazing or micro-cracking caused by freeze-thaw cycles. Check for color fading from UV exposure, which is cumulative even through the shorter daylight hours of winter. Examine bases and contact points where moisture pooling and ice formation can cause deformation.
For pieces showing minor surface wear, a gentle cleaning often restores much of their visual appeal. Pieces with structural cracking or significant warping have reached the end of their outdoor service life and should be retired or moved to sheltered indoor positions where further degradation will not occur.
Cleaning After Winter
Winter deposits grime, mineral residue from snowmelt, and organic debris on outdoor figurines. A thorough spring cleaning prepares overwintered pieces for their new seasonal context. Remove each piece from its position and clean with warm soapy water and a soft-bristle brush. A used toothbrush reaches into detailed areas where debris accumulates. Rinse thoroughly and dry completely before repositioning.
For gnomes and figurines that developed mineral deposits from hard water or salt-laden snowmelt, a brief soak in diluted white vinegar (one part vinegar to four parts water) dissolves most mineral buildup. Follow with a thorough freshwater rinse to remove all vinegar residue.
Spring Placement Strategies
Garden gnome placement follows principles that professional landscape designers apply to all garden ornamentation: visibility, context, scale, and narrative.
Creating Focal Points
Position your most eye-catching gnome or figurine at the primary focal point of your garden, the spot where visitors’ eyes naturally land when they first view the space. This is typically where a path curves, where a bed borders a lawn edge, or where a structure creates a visual anchor point. Your primary gnome should be large enough to read clearly from the main viewing distance, typically the patio, deck, or pathway from which the garden is most frequently observed.
Secondary pieces placed at supporting locations throughout the garden create a sense of discovery. A smaller gnome partially hidden beside a rock encourages closer exploration. A figurine positioned at the end of a garden path rewards those who walk the full route. This layered approach transforms a simple garden into an environment that reveals new details with each visit.
Companion Planting with Gnomes
The most effective garden gnome displays integrate with living plants rather than standing isolated on bare ground. Position gnomes among ground cover, beside emerging perennials, or at the base of shrubs where the plant foliage creates a natural backdrop. As spring progresses and plants grow, the gnome becomes increasingly framed by living greenery, creating an evolving composition that changes throughout the growing season.
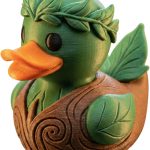
Early spring bulbs, crocuses, tulips, and daffodils, make excellent gnome companions. A gnome figurine positioned among emerging bulb foliage creates a charming vignette that embodies the spirit of the season. As the bulbs bloom, the gnome appears to be tending or admiring the flowers, telling a visual story that strengthens as spring progresses.
Garden Plant Markers
Beyond decorative figurines, 3D printing produces functional garden accessories that combine utility with personality. Plant markers are perhaps the most practical application, turning the mundane task of garden labeling into an opportunity for creative expression.
Design Options
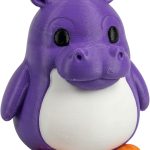
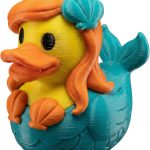
Standard plastic plant tags serve their purpose but contribute nothing to the garden’s visual appeal. 3D printed plant markers replace these forgettable tabs with designs that are themselves small decorative elements. Character-shaped markers featuring tiny gnomes, ducks, or other figures holding name plates add personality to every row and bed. Geometric designs in complementary colors create cohesive visual systems that organize the garden while enhancing its appearance.
For herb gardens and kitchen gardens, themed markers that reference the plant’s culinary use add a practical and decorative touch. A marker featuring a tiny pizza for the basil row or a soup bowl for the parsley bed communicates the plant’s purpose at a glance while adding whimsy to a utilitarian space.
Material Selection for Markers
Plant markers face sustained outdoor exposure in all conditions: direct sun, rain, soil moisture, and physical contact during gardening activities. PETG is the strongly recommended material for any marker that will spend the growing season outdoors. PETG withstands UV exposure without significant degradation, maintains rigidity in wet soil, and resists the accidental impacts that occur during weeding, watering, and harvesting.
Marker stakes should be designed with sufficient length to anchor firmly in garden soil without wobbling. A minimum of 10 centimeters below soil level provides adequate stability in most garden conditions.
Fairy Garden Season
Spring is the prime season for fairy garden creation and expansion. These miniature landscapes combine 3D printed structures and figures with living plants to create enchanting small-scale worlds within larger garden settings or in dedicated containers.
Container Fairy Gardens
Large planters, half-barrels, and dedicated raised beds provide contained spaces for fairy garden creation. Start with a drainage-appropriate container filled with quality potting mix. Plant small-scale living elements: miniature sedums, tiny thyme varieties, small ferns, and creeping ground covers that will remain proportionate to miniature 3D printed accessories.
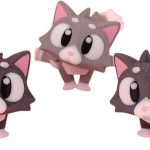
Position miniature gnomes, tiny mushroom houses, small benches, miniature fences, and pathway elements among the plantings. The key to convincing fairy gardens is consistent scale. All 3D printed elements should maintain the same proportional relationship to create the illusion of a believable miniature world. As the living plants grow and fill in around the miniature structures, the fairy garden becomes increasingly magical.
In-Ground Fairy Gardens
For gardeners with permanent beds, fairy garden elements can be integrated directly into existing garden spaces. Tuck miniature gnomes among the roots of established perennials. Position tiny 3D printed bridges over natural depressions in the soil. Place miniature doors against the bases of trees, suggesting tiny inhabitants within. These in-ground installations create surprise elements that visitors discover as they explore the garden.
In-ground fairy garden elements need to withstand direct contact with soil moisture. PETG is essential for any piece placed in or on garden soil. Elevate pieces on small stone bases or flat rocks when possible to reduce prolonged moisture contact with the printed surface.
Outdoor Material and Care Guide
Successful outdoor display of 3D printed garden pieces depends entirely on appropriate material selection and basic seasonal maintenance.
PLA vs. PETG for Outdoor Use
PLA performs beautifully indoors but struggles in outdoor conditions. Its relatively low glass transition temperature means that direct summer sun can soften PLA enough to cause warping, particularly on dark-colored pieces that absorb more solar heat. PLA also absorbs moisture gradually in outdoor conditions, which can lead to surface degradation over a full growing season.
PETG is the superior choice for any 3D print intended for sustained outdoor display. Its higher thermal resistance handles summer sun without deformation. Its moisture resistance prevents the gradual water absorption that affects PLA. PETG maintains its color vibrancy and structural integrity through the full spring-to-fall outdoor season that Canadian gardens enjoy. When selecting outdoor gnomes and garden accessories from the 3DCentral shop, look for PETG options for pieces that will live outside.
Secure Placement
Wind, animals, and the inevitable foot traffic of garden maintenance can displace unsecured figurines. Museum putty provides removable adhesion for pieces placed on hard surfaces like stepping stones, wall tops, and deck rails. Garden stakes printed as part of the figurine base anchor pieces directly into soil. For larger gnomes, a small platform of paving stone or flat rock provides both visual elevation and a stable, level base.
Explore the complete gnomes collection and figurines collection at 3DCentral for garden-ready pieces manufactured in Laval, Quebec. Every piece reflects the craftsmanship and material quality that Canadian outdoor conditions demand.
Frequently Asked Questions
Q: Will PLA gnomes survive a Canadian winter outdoors? A: PLA is not recommended for year-round outdoor display in Canadian climates. Freeze-thaw cycles, sustained moisture, and UV exposure degrade PLA over time, leading to warping, surface crazing, and color fading. For outdoor gnome display that spans winter months, choose PETG-printed pieces. If you have PLA gnomes you want to display in the garden, bring them indoors before the first freeze and return them in spring.
Q: How do I secure 3D printed gnomes so they do not blow over in wind? A: Several approaches work depending on the surface. On hard surfaces like patios and wall caps, museum putty (removable adhesive) provides firm hold without permanent attachment. In garden soil, stake-mounted designs push directly into the ground. On flat rocks or pavers, a small amount of silicone adhesive provides weatherproof attachment that can still be removed with a razor blade if needed. For larger gnomes in exposed locations, filling the hollow interior with sand or fine gravel through the base adds stabilizing weight.
Q: Can I paint or seal 3D printed garden figurines for extra protection? A: Yes, a coat of exterior-grade clear acrylic sealant adds UV and moisture protection to both PLA and PETG garden figurines. Use a spray-applied matte or satin finish to avoid altering the original appearance. Apply two thin coats rather than one heavy coat for best adhesion and uniformity. Reapply annually at the start of each growing season for maximum protection. This is especially valuable for extending the outdoor life of PLA pieces used in sheltered garden positions.