The first layer is the foundation of every 3D print. When adhesion works, you can walk away from the printer with confidence. When it fails, the best slicer settings, finest filament, and most expensive hardware cannot salvage the job. First-layer adhesion problems account for more failed prints than any other single cause, and in a production environment, every failed first layer means wasted material, lost machine time, and delayed orders.
This guide covers the science and practical techniques behind reliable bed adhesion, drawn from experience running 200+ printers at 3DCentral in Laval, Quebec, where our sub-3 percent failure rate depends on getting the first layer right every time.
Why the First Layer Matters More Than Any Other
The first layer serves three critical functions. It anchors the part to the build plate so subsequent layers have a stable foundation. It establishes the dimensional accuracy of the bottom surface. And it determines whether the part will warp, lift, or detach during the hours of printing that follow.
A failed first layer rarely fails silently. It may detach 20 minutes into a 6-hour print, wasting both the material already deposited and the machine time allocated. On a production farm printing hundreds of parts per day, even a 5 percent first-layer failure rate translates to dozens of wasted prints daily.
Build Surface Options and Their Characteristics
PEI Spring Steel Sheets
PEI (polyetherimide) coated spring steel sheets have become the standard for production printing, and for good reason. When heated, PEI provides strong adhesion for PLA, PETG, and most other common filaments. When the plate cools after printing, the steel flexes, popping the finished part free with minimal effort. No adhesion aids are typically needed for PLA on PEI.
Smooth PEI produces a glossy bottom surface on printed parts. Textured PEI adds a matte pattern and provides additional mechanical grip that helps with materials prone to warping. Most production environments, including our facility, keep both smooth and textured plates available and select based on the material and design requirements.
Glass Build Plates
Glass provides the flattest possible build surface, which matters for parts with large flat bases. The trade-off is that glass typically requires an adhesion aid such as glue stick, hairspray, or specialized bed adhesion products. Glass also takes longer to heat evenly and does not flex for part removal, sometimes requiring a scraper.
Specialized Surfaces
Garolite (G10) sheets excel specifically for nylon filaments. BuildTak and similar adhesive sheets provide good all-around adhesion but wear out and need periodic replacement. Powder-coated PEI offers a middle ground between smooth and textured surfaces.
Z-Offset: The Most Critical Calibration
Z-offset, the distance between the nozzle tip and the build surface on the first layer, is the single most sensitive adjustment for adhesion. The ideal gap produces a first-layer extrusion that is slightly wider and flatter than subsequent layers, creating a broad contact patch that grips the build surface firmly.
Signs of Incorrect Z-Offset
When the nozzle is too far from the bed, extruded filament sits on the surface like a round strand of spaghetti rather than squishing flat. It may adhere initially but lifts easily because the contact area is minimal. When the nozzle is too close, it drags through the deposited material, creating a rough, scraped surface and potentially causing nozzle clogs or extruder skipping.
Calibration Procedure
Start with the manufacturer’s recommended Z-offset, then adjust in 0.02mm increments. Print a single-layer calibration square and examine the result. The bottom surface should show smooth, slightly overlapping lines with no gaps between them and no transparency when held to light. The top should feel smooth without ridges or scraping marks. Fine-tune until the first-layer width is approximately 120 percent of the nozzle diameter.
Automated Bed Leveling
Automated bed leveling probes such as BLTouch, inductive probes, and strain-gauge systems measure the build surface at multiple points and create a compensation mesh. This mesh adjusts the Z-height in real time as the nozzle moves across the plate, compensating for surface irregularities. For a production farm where manual leveling of every printer before every print is impractical, automated leveling is essential infrastructure.
Bed Temperature Optimization
PLA Temperature Range
PLA adheres well to PEI at bed temperatures of 55 to 65 degrees Celsius. Within this range, the first layer remains warm enough to stay slightly tacky against the build surface while cooling quickly enough to solidify into a stable shape. Temperatures above 70 degrees cause elephant foot, where the heat-softened base expands outward, distorting the dimensions of the bottom layers.
PETG Temperature Range
PETG requires higher bed temperatures, typically 75 to 85 degrees Celsius. At these temperatures, PETG bonds strongly to PEI, sometimes too strongly. Applying a thin release agent or using textured PEI prevents PETG from bonding so aggressively that part removal damages the build surface.
Temperature Stability
A stable bed temperature matters as much as the target temperature. Temperature fluctuations cause the build surface to expand and contract, which can break the adhesion bond during printing. Quality heated beds with even heat distribution and consistent PID-tuned temperature control produce more reliable adhesion than beds with hot and cold spots.
Environmental Factors That Sabotage Adhesion
Drafts and Air Movement
Cold air drafts from HVAC systems, open windows, fans, or even foot traffic near the printer cause uneven cooling of the first layer. The side exposed to the draft cools faster, contracts, and lifts from the bed. This asymmetric warping is one of the most common adhesion failures in home and workshop environments.
Ambient Temperature
Cold ambient temperatures accelerate first-layer cooling across the entire print surface. This is particularly problematic during Canadian winters, when workshop and garage temperatures can drop significantly. Printer enclosures shield the build environment from cold ambient air and maintain a warmer, more stable atmosphere around the build plate.
Humidity
Very dry air accelerates evaporative cooling from the build surface. Very humid air can leave a moisture film on the build plate that interferes with adhesion. Moderate relative humidity between 35 and 55 percent provides the best conditions.
Build Surface Maintenance
Cleaning Protocol
Oils from fingerprints are the most common cause of localized adhesion failure. Handle build plates by the edges and clean with isopropyl alcohol (90 percent or higher concentration) before every print session. For stubborn contamination, a gentle scrub with dish soap and warm water followed by IPA removes accumulated residue.
Surface Renewal
PEI surfaces degrade over time. The adhesion coating wears thin in high-use areas, creating inconsistent adhesion across the plate. Periodic light sanding with 1000 to 2000 grit sandpaper rejuvenates the surface. Textured PEI plates last longer than smooth ones because the texture distributes wear more evenly.
Production-Scale Adhesion Management at 3DCentral
At our Laval, Quebec facility, first-layer reliability is a system-level priority, not a per-printer concern. Every printer in the fleet runs automated bed leveling with mesh compensation. Build plates are cleaned with IPA between every print. Z-offsets are verified during routine maintenance cycles. Climate control maintains stable temperature and humidity year-round, eliminating the environmental variables that plague home workshops.
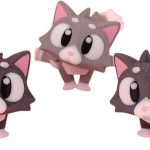
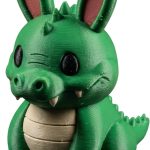
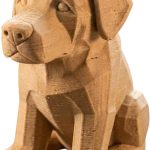
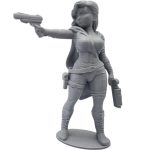
This systematic approach keeps our failure rate below 3 percent across 200+ machines producing the collectible figurines, decorative ducks, and gnome designs found in our shop and on Amazon. For print farm operators looking to achieve similar reliability with production-tested designs, the 3DCentral Commercial License provides access to models with proven print profiles.
Frequently Asked Questions
Q: What is the best build surface for printing PLA collectible figurines? A: PEI-coated spring steel sheets provide the best combination of adhesion, easy part removal, and durability for PLA production. Textured PEI adds a matte bottom finish and slightly better grip, while smooth PEI produces a glossy base. Both work well for decorative figurines without requiring adhesion aids.
Q: How often should you replace a PEI build plate on a production 3D printer? A: With proper care, including IPA cleaning between prints and periodic light sanding, a quality PEI plate lasts 6 to 12 months of daily production use. Signs of replacement need include inconsistent adhesion across the surface, visible wear marks, and parts that no longer release cleanly after cooling.
Q: Why do my 3D prints stick too well to the bed and tear when I try to remove them? A: Over-adhesion is usually caused by the nozzle being too close to the bed (creating excessive squish), bed temperature set too high, or using PETG on smooth PEI without a release agent. Let the plate cool completely before attempting removal, and adjust Z-offset upward by 0.02mm increments until removal is easy without sacrificing first-layer quality.