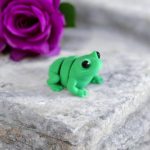
Painting a 3D printed figurine transforms a monochrome object into something with genuine character. A well-painted piece commands attention on a shelf, draws compliments from visitors, and carries a sense of personal craftsmanship that unpainted prints simply cannot match. The good news is that achieving professional-looking results does not require years of experience or expensive equipment. It requires patience, the right materials, and a systematic approach.
Whether you have picked up a striking figurine from 3DCentral and want to add a personal touch, or you print your own models and want to elevate your finishing game, this guide covers everything from initial preparation through final sealing.
Surface Preparation: The Step Most People Rush
Surface preparation is where professional results are made or lost. Skipping or rushing this phase leads to paint that chips, flakes, or looks rough regardless of your brushwork skill. Invest the time here and everything afterward becomes easier.
Removing Support Material
Most figurines printed via FDM have support structures that leave marks when removed. Use flush cutters to remove the bulk of the support material, then clean up remnants with a hobby knife or small files. Work carefully around delicate features like fingers, wings, or facial details. A set of needle files in various profiles (flat, round, triangular) is invaluable for reaching into tight areas.
Sanding for Smoothness
Start with 120-grit sandpaper to knock down the most prominent layer lines and support scars. Progress through 220-grit for general smoothing and 400-grit for a refined surface. For competition-level finishes, continue through 600 and 800 grit. Wet sanding at finer grits reduces dust and produces a smoother result.
PLA sands well but generates fine dust that you should avoid inhaling. Work in a ventilated area or wear a dust mask. Pay attention to large flat surfaces where layer lines are most visible. Curved and detailed areas are more forgiving because the eye expects texture variation there.
Filler Primer: The Shortcut to Smoothness
Spray-on filler primer serves double duty. It fills minor layer lines and surface imperfections while creating an ideal surface for paint adhesion. Apply two to three light coats, allowing each coat to dry completely (typically 15-20 minutes between coats). After the final coat dries fully (one hour minimum), lightly sand with 400-grit to knock down any primer texture.
Filler primer also reveals surface defects you missed during sanding. Under the uniform gray primer, dips, scratches, and remaining layer lines become obvious. Spot-fill problem areas with a thin layer of automotive body filler or modeling putty, sand smooth, and re-prime.
The Importance of Degreasing
Before priming, wash the figurine with warm soapy water to remove sanding dust, finger oils, and any residual release agents. PLA does not typically have release agents, but handling during sanding deposits skin oils that interfere with paint adhesion. Let the piece dry completely before priming.
Choosing the Right Paints
Not all acrylic paints perform equally on 3D printed surfaces. Understanding the differences between paint types helps you select the right product for your project and skill level.
Miniature Painting Acrylics
Brands like Vallejo, Citadel (Games Workshop), Army Painter, and Scale75 are formulated specifically for painting small figures. They offer extremely fine pigment particles, consistent viscosity out of the bottle, and extensive color ranges designed for figure painting. These paints are self-leveling, meaning brush strokes tend to smooth out as they dry.
Vallejo Model Color is widely considered the best starting point. The dropper bottles allow precise paint rationing, the color range is enormous, and the paint thins well with water. Citadel paints are more expensive but offer excellent coverage and an extensive system of base, layer, shade, and technical paints designed to work together.
Craft Acrylics
Budget-friendly craft acrylics from brands like Apple Barrel or FolkArt work on 3D prints but require more effort. Their pigment particles are coarser, so they obscure fine detail more quickly. They also dry with a thicker, more textured finish. For large pieces without fine detail, or for base coating before detail work with miniature paints, craft acrylics are a reasonable choice.
Spray Paints for Base Coating
Spray paint applies an even base coat quickly and efficiently. Use spray paint designed for plastic (like Rust-Oleum Painter’s Touch or Tamiya spray primers). Hold the can 8-12 inches from the surface and apply in light, sweeping passes. Heavy coats cause drips and obscure detail. Two light coats provide better coverage than one heavy coat.
Essential Painting Techniques
With a prepared surface and good paints in hand, these fundamental techniques produce results that look far more accomplished than their difficulty level suggests.
Base Coating
The base coat establishes the foundation color for each area of the figurine. Thin your paint to roughly the consistency of milk (approximately 1:1 paint to water ratio) and apply two to three thin coats rather than one thick coat. Thin coats preserve surface detail, dry faster, and produce a smoother finish. Allow each coat to dry for 10-15 minutes before applying the next.
Washing (Shade Application)
A wash is heavily thinned dark paint (or a pre-made wash product like Citadel Nuln Oil or Agrax Earthshade) that flows into recesses, crevices, and details. Apply the wash generously over base-coated areas. As it dries, it pools in low points and wipes clean from raised surfaces, creating natural-looking shadow and depth with minimal effort. Washing is often called “talent in a bottle” because it makes even basic paint jobs look dramatically better.
Dry Brushing
Dry brushing highlights raised surfaces and edges. Load a brush with paint, then wipe most of it off on a paper towel until the brush is nearly dry. Lightly drag the brush across raised surfaces. The small amount of remaining paint catches on edges and raised detail, creating highlights. Use a color one or two shades lighter than your base coat. This technique is fast, forgiving, and produces excellent results on textured surfaces like scales, fur, wood grain, and fabric folds.
Layering for Advanced Results
Layering involves gradually building up lighter shades on raised areas while leaving darker base coats visible in recesses. Start with a dark base, then apply progressively lighter shades to increasingly smaller areas of the raised surfaces. Each layer should be thinned and applied smoothly. This technique requires more time and practice but produces the smoothest, most realistic color transitions.
Working With 3D Print-Specific Challenges
FDM prints present unique challenges that differ from painting injection-molded miniatures or resin-printed figures.
Layer Lines as Texture
Not every layer line needs to be eliminated. On organic surfaces like tree bark, stone, fabric, or scales, layer lines can actually enhance the appearance by adding texture. Evaluate each area of the figurine and decide whether the layer lines work with or against the intended surface. Strategic sanding removes lines where they are unwanted while preserving them where they add character.
Large Flat Surfaces
Large flat surfaces on FDM prints show every imperfection. Extra sanding and priming attention on these areas pays dividends. When painting, use thin coats and maintain a “wet edge” to avoid visible brush stroke boundaries on large areas. Alternatively, spray paint large flat areas and hand-paint details.
Part Lines and Seams
Multi-part figurines have seam lines where pieces join. Fill these with plastic putty or gap-filling super glue before priming. Sand smooth and blend into the surrounding surface. These seams are invisible after painting if properly addressed but glaringly obvious if ignored.
Sealing and Protecting Your Work
A clear protective coat is essential. It protects your paint job from handling wear, dust adhesion, and UV fading. Without a sealant, acrylic paint on handled pieces wears off within weeks.
Varnish Options
Matte varnish eliminates shine for a natural, realistic appearance. It is the preferred choice for most figurine painting. Satin varnish provides a slight sheen that works well for skin, cloth, and organic surfaces. Gloss varnish creates a high-shine finish ideal for wet effects, gems, eyes, and metallic surfaces. Many painters apply matte overall and then selectively add gloss to specific areas like eyes or jewels.
Application Methods
Brush-on varnish gives precise control but can leave brush marks if applied too thickly. Spray varnish (like Testors Dullcote or Vallejo spray varnish) provides an even coat without brush marks. Apply two thin coats with full drying time between them. Avoid spraying in high humidity, which causes a white “frosting” effect on matte varnishes.
Display and Enjoyment
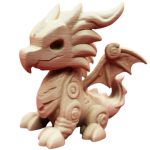
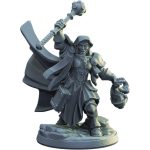
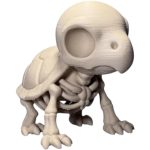
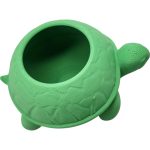
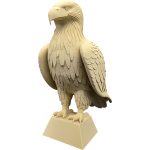
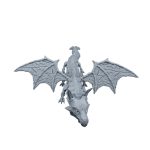
A well-painted figurine deserves proper display. Consider display cases with UV-filtering glass to prevent long-term color fading. LED accent lighting, particularly warm white, enhances painted surfaces and draws attention to your work. Browse the full range of paintable collectibles in the 3DCentral shop to find your next project, from intricate dragons to charming gnomes and articulated ducks.
Frequently Asked Questions
Q: Do I need to prime 3D printed figurines before painting? A: Priming is strongly recommended for the best results. Primer (especially filler primer) fills minor layer lines, creates a uniform surface color for consistent paint application, and dramatically improves paint adhesion. Without primer, acrylic paint may bead up or chip off PLA surfaces, especially on handled pieces. A light sanding with 220-grit before priming further improves adhesion.
Q: What is the best beginner technique for painting 3D printed figurines? A: The fastest path to impressive results for beginners is the “base coat, wash, dry brush” method. Apply a solid base color in two thin coats, apply a dark wash over the entire surface to add shadow and depth, then dry brush a lighter shade to highlight raised details. This three-step process takes minimal skill yet produces results that look surprisingly professional, especially on textured surfaces with lots of detail.
Q: Can I paint figurines printed in colored filament, or should I use white? A: You can paint over any filament color, but lighter colors (white, light gray, natural) require fewer coats of paint to achieve accurate final colors. Dark filament colors can show through thin paint layers and shift the perceived color. If you plan to paint a piece, printing in white or light gray reduces the number of paint coats needed and produces more vibrant final colors. If you want specific areas to remain unpainted, printing in the desired filament color saves work.